Inventory - Bar Code Scanning
 Overview
Every inventory item added to YMS is automatically assigned a unique YMS barcode, which can be printed as a label for quickly scanning and locating the item. You can also link an inventory item to a supplier's own barcode instead of printing a duplicate label.
Scan a Bar code
Bar code scanners function like a keyboard — they input the scanned number directly into the system.
Click into the Bar Code Search field in the Inventory module.
Scan the item using a bar code scanner connected to your device.
YMS searches your inventory automatically:
If an exact match is found, the matching inventory item is displayed on screen.
If multiple items share the same bar code, or partial matches are found, YMS displays a list of results so you can select the correct item.

Add a Bar code
In many cases, inventory already comes with bar code labels printed by the manufacturer or supplier. Instead of printing a duplicate label, you can link the supplier's barcode to the inventory item in YMS.
Open the inventory record.
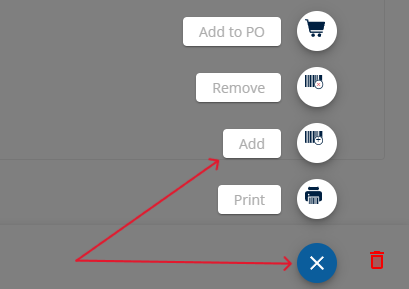
Click the Speed Dial button.
Select Add Barcode Number.
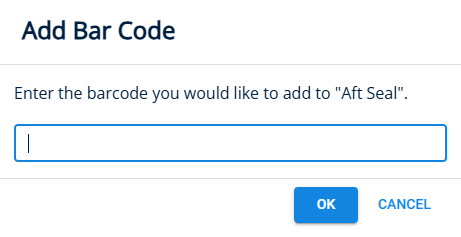
Scan or enter the supplier's barcode.
Click Save.
You can now use the supplier's barcode to identify this inventory item in YMS.
Removing a Supplier Bar Code
You'll typically need this if a barcode was linked to the wrong inventory item, for example, if scanning brings up an unexpected inventory item on screen.
Open the inventory record.
Click the Speed Dial button.
Select Remove Barcode Number.
Enter or scan the barcode number to remove.
Click Ok.
Confirm Yes on the "Are you sure you wish to remove barcode from inventory?" prompt.